RSS

Blog posts of '2025' 'December'

Moisture-Proof Splashbacks: Strengthening Your Kitchen’s Long-Term Performance

Moisture-Proof Splashbacks: Strengthening Your Kitchen’s Long-Term Performance

In today’s home-upgrade landscape, moisture protection isn’t a luxury—it’s a baseline requirement. Kitchens operate under continuous humidity cycles, and without the right safeguards, walls deteriorate quietly but rapidly. A moisture-proof splashback stabilizes the environment and delivers long-term structural resilience.


Why Moisture Control Is Mission-Critical

Steam from cooking zones, dishwashing backsplash, and routine cleaning generate persistent moisture exposure. Traditional painted walls or tiled grout lines eventually yield to swelling, mold, and surface weakening. A moisture-rated splashback closes this vulnerability. For homeowners seeking a streamlined, future-focused solution, explore the moisture-resistant portfolio at DIY Splashbacks – Acrylic Panels.


Materials Engineered for Stability

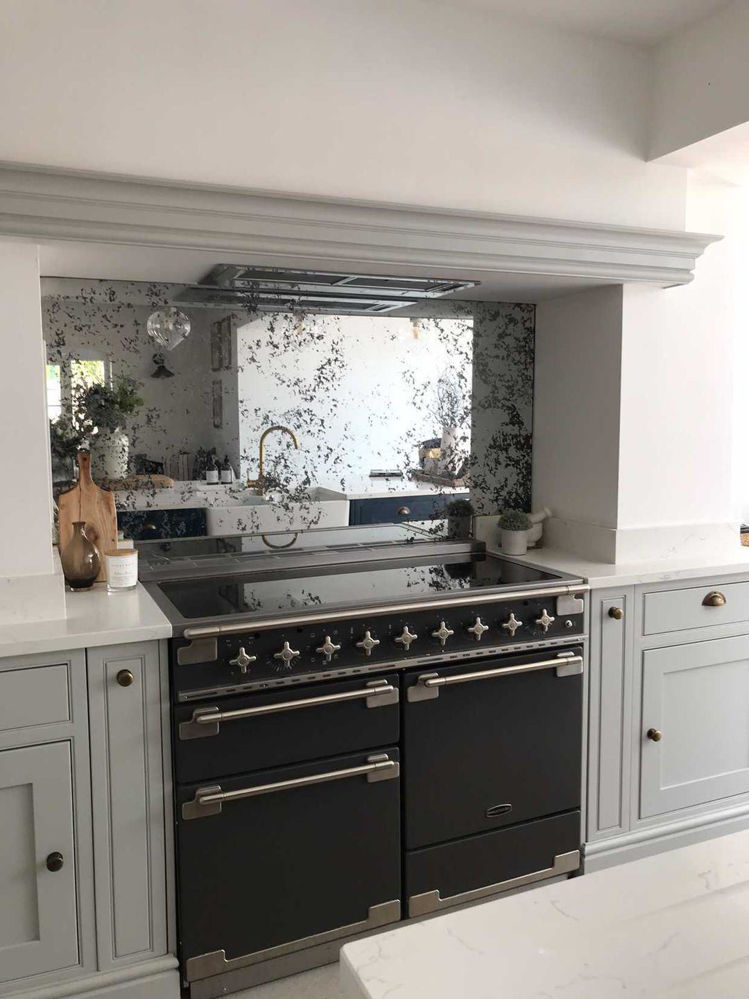
Acrylic, glass, and hybrid composite panels continue to outperform older wall finishes. Their non-porous build, color stability, and high-integrity surfaces allow them to maintain performance under constant humidity. For custom sizing, color-matching, and material comparisons, the configurator at

DIY Splashbacks – provides an immediate lift in planning accuracy.


Design Value That Pays Off

Moisture-proof systems also amplify operational efficiency. With no grout lines and fewer dirt traps, maintenance cycles shorten and visual consistency improves. This positions the kitchen as both a functional asset and a design statement.


Deployment With Minimal Friction

Most installations lock into existing layouts with precision. Lightweight acrylic or glass panels allow installers to achieve high-quality results without extensive downtime. The installation guidance at

DIY Splashbacks TUTORIALS

keeps the process streamlined and repeatable.


Bottom Line

Moisture-proof splashbacks reinforce the backbone of the kitchen. They protect, they elevate, and they deliver measurable longevity across the home. In a world where consumers expect durability and clarity of purpose, this upgrade meets both needs head-on.

DIY Under-Cabinet Herb Rack: Streamlined Access, Zero Counter Clutter

DIY Under-Cabinet Herb Rack: Streamlined Access, Zero Counter Clutter

In today’s efficiency-driven kitchens, rapid access to fresh ingredients isn’t a luxury—it’s a baseline operational requirement. Yet the traditional wisdom still stands: the simplest solutions often deliver the strongest ROI. An under-cabinet herb rack merges these two philosophies into one compact, future-ready upgrade.


Why This Build Works

Space Optimization: Leverages dormant under-cabinet real estate without disrupting your existing workflow.

Freshness on Demand: Keeps everyday herbs within arm’s reach, accelerating meal prep cycles.

Clean Aesthetic: Elevates visual continuity without over-engineering the environment.


Materials Required

• Slim wooden or metal strip (length matches cabinet width)

• Small screw-in hooks

• Screws + screwdriver

• Measuring tape

• Mini labeled jars with looped lids

• Optional: matte finish spray for a cohesive look


Implementation Roadmap

1. Baseline Measurement: Capture the width beneath the cabinet to size your strip with precision.

2. Hardware Deployment: Install the hooks along the strip at equal intervals to maintain visual symmetry.

3. Mounting: Fix the strip underneath the cabinet, ensuring consistent alignment with the cabinet edge.

4. Jar Load-In: Fill your mini jars with herbs, secure the looped lids, and hang them from the hooks.

5. Quality Assurance: Open and close a few jars to confirm ergonomics and accessibility.


Performance Benefits

This solution scales elegantly in both compact and full-size kitchens. It frees counter space, elevates workflow efficiency, and reinforces a clean, traditional kitchen aesthetic—without compromising modern expectations.


Bonus: Visual Cohesion with Your Splashback

If your kitchen features a glass or acrylic splashback, aligning the jar colors and labels with that backdrop can create a polished, legacy-meets-modern finish. For high-grade materials, customization, or long-term upgrades, review options from DIY Splashbacks through their product ecosystem:


Closing Insight

This is a low-risk, high-value install that delivers immediate operational clarity. No clutter. No guesswork. Just streamlined functionality anchored in classic kitchen principles.

Sustainable Splashbacks: How Eco-Savvy Design is Reshaping Modern Kitchens

Sustainable Splashbacks: How Eco-Savvy Design is Reshaping Modern Kitchens

In a marketplace where consumers demand accountability and efficiency, sustainable splashbacks are rapidly transitioning from a niche concept to a strategic design standard. Homeowners want spaces that deliver visual impact while honoring long-standing craftsmanship—and modern eco-focused materials are stepping up to the mandate.


Why Sustainability Is Driving the Conversation

Environmental stewardship isn’t just a trend; it’s a long-term operational expectation. Households are shifting toward materials that reduce waste, extend lifecycle value, and maintain the timeless durability kitchens have always required. Today’s eco-forward splashbacks align innovation with the traditional demand for surfaces that hold up under real-world use.


Material Solutions That Move the Needle

1. Recycled Glass Panels

These elevate aesthetics while capitalizing on reclaimed resources. They produce a polished, high-end finish without compromising environmental integrity.

2. Low-VOC Acrylic Sheets

Engineered for clarity and resilience, they maintain air quality standards and deliver seamless color consistency across the kitchen.

3. Stainless Steel with Recycled Content

A classic favorite—heritage-grade durability with a modern sustainability twist.


Operational Benefits That Stand the Test of Time

• Low maintenance workflows reduce long-term overhead for busy households.

• Hard-wearing surfaces safeguard against daily impact without losing visual equity.

• Heat and moisture resistance ensure a future-proof design strategy.


Installation Efficiency That Respects Tradition

While sustainability drives the narrative, the installation frameworks remain aligned with tried-and-true methods—precise measurement, clean prep, and structured mounting. The process mirrors classic craftsmanship while leveraging next-gen materials.


Where to Source High-Value Sustainable Options

Looking to deploy eco-driven splashbacks with industry-grade reliability? Explore solutions from DIY Splashbacks, where you’ll find a curated portfolio of sustainable materials, custom finishes, and seamless ordering processes.


Final Remarks

Sustainable splashbacks aren’t just an upgrade—they’re a strategic investment in long-term home performance. They reinforce heritage design values while empowering homeowners with energy-conscious materials built for the future.

DIY Magnetic Spice Strip: A Space-Savvy Upgrade for Busy Kitchens

DIY Magnetic Spice Strip: A Space-Savvy Upgrade for Busy Kitchens

In today’s efficiency-driven home environment, small optimizations create big operational wins. A magnetic spice strip delivers exactly that—tight organization, seamless access, and a clean, elevated aesthetic. It’s a return to fundamentals, executed with next-gen precision.


Why This Upgrade Works

Kitchen workflows are increasingly dynamic. A magnetic spice strip centralizes essentials, cuts motion waste, and supports a streamlined cooking cadence. Whether you operate in a compact galley kitchen or a full-scale family setup, this solution keeps your countertops clear and your process intentional.

Materials Needed

• Narrow stainless-steel strip or aluminum bar

• Strong neodymium magnets

• Screws and wall plugs

• Drill

• Measuring tape

• Optional: Paint for the strip (to match your kitchen color scheme)


Implementation Playbook

1. Identify the value zone

Choose the high-traffic perimeter—usually between the stovetop and prep area. This ensures spices stay within a single arm’s reach, preserving classic kitchen ergonomics.

2. Measure with discipline

Capture your wall span and align the strip length for a tight, no-waste fit. Legacy builders always say: “Measure twice, drill once.” The wisdom still holds.

3. Drill and fasten

Mark your drill points, anchor the screws, and secure the strip. Aim for a level finish; consistency communicates craftsmanship.

4. Magnetize your jars

Attach neodymium magnets to the lids. These deliver long-term strength and a premium feel.

5. Deploy your spice lineup

Position jars on the strip. The vertical display boosts clarity, accelerates decision-making, and transforms spices into a design feature.


Benefits That Move the Needle

• Zero clutter, maximum efficiency

• Upgraded visual framework that adds both form and function

• Faster cooking workflow with everything in immediate reach

• Adaptable to any kitchen style, from traditional to modern


Conclusion

This magnetic spice strip delivers a high-impact, low-lift upgrade that respects traditional kitchen workflows while pushing your space into a more agile, modern rhythm. It tightens organization, elevates visual consistency, and reinforces the kitchen as a high-performance zone. When paired with a well-selected glass splashback from DIY Splashbacks, you’re not just improving aesthetics—you’re building a long-term operational asset.

DIY Appliance Maintenance Routines: Extending Kitchen Performance Without the Guesswork

DIY Appliance Maintenance Routines: Extending Kitchen Performance Without the Guesswork

In every high-functioning kitchen, longevity isn’t an accident — it’s the by-product of disciplined maintenance. Households that prioritize routine DIY care consistently outperform those that only react when breakdowns happen. Bringing a proactive, tradition-backed approach to appliance upkeep ensures your kitchen ecosystem stays efficient, safe, and visually aligned with modern expectations.


Why Maintenance Still Wins the Long Game

Appliances are capital assets. Treat them as such, and they’ll deliver sustained ROI. A structured upkeep routine drives:

• Longer operational lifespan

• Reduced energy consumption

• Lower cost-to-own

• Better day-to-day performance

It’s the classic “fix before failure” mindset — still the gold standard.--


1. Refrigerator Performance Protocols

• Lock in reliability with these simple routines:

• Coil dust-offs every 90 days to stabilize energy draw.

• Seal inspections to safeguard cooling efficiency.

• Shelf decluttering cycles to maintain airflow integrity.

This keeps the fridge operating like a stable, legacy asset.


2. Oven & Cooktop Uptime Safeguards

• Your heat-based appliances thrive on clarity and cleanliness:

• Burner clearing to prevent ignition delays.

• Oven interior wiping to avoid smoke load buildup.

Temperature calibration checks to retain cooking accuracy.

The goal is consistent, predictable performance — the backbone of every generational kitchen.


3. Microwave Reliability Touchpoints

• Small unit. Big wins:

• Turntable lubrication checks

• Filter wipes for cleaner airflow

• Door latch tightening for uninterrupted operation

These micro-optimizations deliver macro stability.


4. Dishwasher Lifecycle Boosters

• Water-driven units demand structure:

• Filter cleansing to prevent grit redistribution.

• Spray arm unclogging to guarantee full-pressure reach

• Vinegar cycle runs to reduce limescale drag

A minimal investment for major efficiency retention.


5. Everyday Appliances: High-Leverage Quick Wins

•Your kettle, toaster, blender, and mixer all benefit from:

• Cord inspections

• Blade alignment checks

• Crumb clearing

• Descaling routines

Small touches, major longevity.


Where Splashbacks Support the System

Clean, durable surfaces around appliances streamline every maintenance cycle. A well-installed splashback protects walls from heat, steam, oil, and daily wear — accelerating cleanup and preserving overall kitchen hygiene. For future installs or replacements, DIY Splashbacks remains the benchmark for high-quality, customizable solutions:


Final Takeaway

A disciplined DIY maintenance rhythm is not just smart practice — it’s strategic kitchen management. Honor traditional care standards, apply forward-focused efficiency, and create a kitchen that performs today and endures tomorrow.

Disability-Friendly Splashbacks: Height, Texture & Contrast for Visually Impaired Cooks

Disability-Friendly Splashbacks: Height, Texture & Contrast for Visually Impaired Cooks

Building an accessible kitchen isn’t just good practice—it’s a strategic win. When you design with visually impaired cooks in mind, the splashback becomes a key workflow enhancer. Height, texture, and contrast aren’t merely design choices; they’re operational levers that sharpen safety, boost confidence, and drive a seamless culinary experience anchored in time-tested best practices.


Optimizing Height for Predictable Reach

Consistency is king. When a splashback is installed at a height that aligns with established touchpoints—worktops, control knobs, wall edges—it helps visually impaired users map the kitchen with ease. This predictable layout drives muscle memory and reduces unnecessary navigational friction.

Right-sized height placement also reinforces intuitive orientation, giving the user a reliable spatial anchor throughout daily cooking tasks.


Deploying Texture as a Navigational Framework

Texture becomes a guidance system in an accessible kitchen. By leveraging varied finishes, you create tactile micro-landmarks that help visually impaired cooks interpret zones quickly.

• Raised or embossed textures: Signal hazard zones such as stovetops.

• Smooth, glossy finishes: Mark safe pass-throughs or neutral areas

• Matte, grippy textures: Define prep or high-contact work zones.

This tactile strategy modernizes a traditional design principle—letting touch lead where vision may not.


Driving Contrast for Low-Vision Clarity

Visual contrast is a timeless accessibility standard. Strategic color differences between the splashback and surrounding surfaces amplify visibility and accelerate recognition.


Whether it’s bold dark-on-light pairings or patterns that create depth, contrast helps low-vision cooks move with certainty. It cuts down on guesswork, supports safety, and enhances the overall kitchen workflow.


Material Selection That Supports Durability and Inclusivity

A future-proof kitchen balances rugged materials with custom accessibility features. Glass, acrylic, and composite splashbacks offer longevity—but the edge comes from tailoring finishes, colors, and tactile cues.

This is where DIY Splashbacks leads from the front. Their customizable range allows you to:

• Adjust texture for tactile clarity

• Select high-contrast color options

• Fine-tune sizing and height specs


You can also deep dive into their design ranges for texture and contrast-driven layouts:

Glass Splashbacks

Acrylic Splashbacks


Future-Proofing Through Inclusive Design

Disability-friendly splashbacks align legacy design wisdom with modern accessibility mandates. When you harmonize height, texture, and contrast, you build a kitchen that empowers visually impaired users while maintaining classic design integrity.

For tailored designs, tactile customization, and high-contrast splashback concepts, explore the full range at DIY Splashbacks.