RSS

Blog

Quick Fix for Squeaky Doors Using Petroleum Jelly: A DIY That Keeps Your Home Running Smoothly

Quick Fix for Squeaky Doors Using Petroleum Jelly: A DIY That Keeps Your Home Running Smoothly

In modern home management, operational excellence starts with eliminating small disruptions before they escalate. A squeaky door is one of those everyday friction points—literally. It distracts, disrupts, and chips away at the user experience inside any living space. The good news? You don’t need specialized tools or high-priced lubricants. A classic household essential—petroleum jelly—provides a clean, reliable fix that stands the test of time.


Why This DIY Matters

This method aligns with long-standing maintenance best practices. Petroleum jelly builds a smooth, long-lasting lubrication layer over metal hinges, reducing friction and restoring seamless movement without mess or downtime.

What You’ll Need

• Petroleum jelly

• Clean cloth or tissue

• Flathead screwdriver (optional)


Step-by-Step Execution

1. Identify and Access the Hinge

Open the door wide enough to clearly access the hinge plates. If you want deeper penetration into the mechanism, gently lift the hinge pin with a flathead screwdriver. It’s not mandatory, but it accelerates results.

2. Apply the Petroleum Jelly

Work a small amount of petroleum jelly directly into the hinge. Use your finger or cloth to push it into the moving gap. This is where the friction reduction happens.

3. Cycle the Door

Open and close the door multiple times to distribute the jelly evenly. The squeak should start fading immediately as the lubrication settles into place.

4. Clean Up for a Polished Finish

Wipe away any excess from around the hinge. This keeps the hardware looking neat and prevents dust from sticking to the surface.


Final Takeaway

This is a straightforward, high-return DIY that elevates your home’s day-to-day performance without extra cost or complicated tools. By leveraging what you already have on hand, you’re maintaining a streamlined environment with minimal overhead—exactly the kind of strategic home care that keeps everything running smoothly.

VOC Emissions from Adhesives: Choosing Low-Emission Glues for Child-Safe Kitchens

VOC Emissions from Adhesives: Choosing Low-Emission Glues for Child-Safe Kitchens

Cut to the chase: adhesives matter. The glues you choose during cabinet installation, splashback fitting, or countertop trim can emit volatile organic compounds (VOCs) that raise indoor air concentrations — and children are especially vulnerable. Below is a concise, practical playbook to select low-emission adhesives and reduce risk in kitchen projects.


What you need to know (fast)

VOCs are gases emitted from many adhesives and building products and can remain higher indoors than outdoors. Short-term exposures cause irritation, headaches and nausea; long-term exposure to some compounds (e.g., benzene, formaldehyde) has more serious health concerns. 

Children have higher exposure risk: they breathe more air per kilogram of body weight, spend more time on the floor where some pollutants settle, and their developing lungs and immune systems are more sensitive. 

Certifications and product type matter — look for third-party low-emission marks (GREENGUARD, Green Seal, etc.), and prefer water-based or hot-melt technologies where suitable. 


Quick checklist before you buy

1. Ask for emissions data — product technical data sheets (TDS) or safety data sheets (SDS) should list VOC content (g/L) and any hazardous constituents.

2. Prefer certified products — GREENGUARD/GREENGUARD Gold or Green Seal certification indicates low chemical emissions for indoor use. 

3. Choose water-based or hot-melt adhesives — for interior cabinetry and splashback trims when performance allows; avoid solvent-borne/contact adhesives in poorly ventilated spaces. 

4. Plan ventilation during and after installation — run mechanical ventilation or open windows for 24–72 hours after application where feasible. 


Which adhesives are generally lower risk?

PVA / white woodworking glues (water-based) — low VOC, strong for joinery and many cabinet tasks. Good first choice for wood-to-wood.

Hot-melt adhesives — negligible off-gassing once cooled; useful for panel lamination and some trim work.

MS-polymer / hybrid adhesives (solvent-free) — engineered for building use with lower VOC profiles than older solvent-based adhesives; check manufacturer certification.

Epoxy and polyurethane adhesives — can be low-VOC versions but some formulations release reactive compounds during cure — review SDS and consider ventilation.

Solvent-based/contact adhesives and spray adhesives — typically higher VOC; avoid in enclosed areas where children live unless strictly required and you can isolate and ventilate.

(Always confirm specifics with the manufacturer — product chemistry varies.)


Certifications & standards to rely on

GREENGUARD / GREENGUARD Gold — emission limits for indoor products; a reliable indicator for adhesives and building materials used indoors. 

Green Seal / eco-labels — regionally useful for consumer guidance; verify whether they cover VOC emissions specifically.

Manufacturer VOC listing (g/L) — lower is better; for interior use, aim for adhesives with VOC content clearly labeled and demonstrably low.


Installation best practices for child-safe kitchens

Isolate the work area — seal off the kitchen from the rest of the house with plastic sheeting; keep children and pets away during work.

Ventilate aggressively during and after — run exhaust fans, open windows, use portable air purifiers with activated carbon/HEPA if available. WHO and EPA guidance emphasize ventilation as a primary mitigation step. 

Follow cure times exactly — many issues arise when surfaces are used before adhesives finish off-gassing. Manufacturers publish recommended cure/ventilation windows on TDS/SDS.

Consider scheduling — if you can, do installations while occupants (especially children) are away for the day and ventilate the space thoroughly before re-entry.


Testing & remediation (if you suspect elevated VOCs)

Use a consumer VOC monitor for a quick read; professional IAQ testing gives compound-specific concentrations and is recommended if symptoms persist. 

Source removal — if a particular product is the culprit, remove or seal it (paint/encase) and increase ventilation.

Long-term control — select low-emission finishes and avoid cumulative VOC loads from paints, cleaners and air fresheners.


Buyer-ready language (say this to suppliers)

• “Provide the TDS and SDS showing VOC content (g/L) and cure-time recommendations.”

• “Is this product GREENGUARD or Green Seal certified for indoor air quality?”

• “What specific VOCs are in the formulation (e.g., formaldehyde, toluene, xylene)?”


Closing, action-oriented summary

Selecting low-emission adhesives is straightforward if you adopt a compliance-first mindset: insist on documented emissions, prefer certified and water-based technologies, ventilate rigorously during installation, and isolate children from active work zones. These pragmatic controls reduce exposure immediately and set you up for long-term indoor air quality resilience.


For practical splashback selection and DIY fit options that pair well with low-emission installation workflows, see resources and product options at DIY Splashbacks — their guides include installation notes and product samples which can help you pair a low-emission adhesive choice with the right splashback material. 

Restore Burnt Pots Using Salt & Lemon: A Simple DIY That Delivers

Restore Burnt Pots Using Salt & Lemon: A Simple DIY That Delivers

In a world where households are doubling down on cost-efficiency and asset optimization, burnt pots remain one of the most persistent pain points. Instead of discarding cookware and driving up replaecement costs, this legacy-approved DIY provides a clean, controlled pathway to restore functionality with minimal inputs.


Why This Works

Salt delivers the abrasion. Lemon delivers the lift. Together, they create a friction-smart cleaning workflow that cuts through burnt residue without compromising the pot’s integrity.

What You’ll Need

• One lemon (halved)

• Two tablespoons of salt

• A little warm water

• Soft sponge


Execution Roadmap

1. Prep the Surface

Rinse the pot with warm water to soften the initial layer of residue. This sets the base for a smoother cleaning pass.

2. Deploy the Salt

Scatter salt generously across the burnt areas. This becomes your micro-abrasive engine—reliable, predictable, and time-tested.

3. Activate with Lemon

Use the cut side of the lemon to scrub across the salted surface. The natural acidity accelerates residue breakdown, while the salt amplifies your cleaning leverage.

4. Rinse and Review

Rinse under warm water. If the burn marks persist, reapply salt and run a secondary pass with firmer pressure.

5. Final Polish

Finish with a gentle sponge wipe to standardize the surface and restore that clean, kitchen-ready look.


Closing Insight

This DIY isn’t just a quick fix—it’s an operational win. You’re reclaiming cookware lifespan, reducing waste, and reinforcing smart home-management decisions. If you’re looking to build out more DIY content or integrate multiple household hacks into a single blog series, I can produce the next one on demand.

The Rapid Shine Protocol: A Simple DIY That Elevates Your Home’s Clean Standard

The Rapid Shine Protocol: A Simple DIY That Elevates Your Home’s Clean Standard

In today’s fast-moving households, efficiency is everything. Homeowners want solutions that deliver immediate impact without compromising the timeless practices that have kept homes spotless for generations. This DIY approach brings both worlds together — a fast, cost-effective routine grounded in the proven fundamentals of home care.


Why This Method Works

Families rely on adaptable cleaning systems that cut through everyday mess without adding complexity. This protocol drives results quickly, enhancing the look and feel of your home with minimal effort.


What You’ll Need

To deploy this at scale across your home, all you need are familiar, budget-friendly tools:

• White vinegar

• Dish soap

• Baking soda

• Warm water

• Microfiber cloth

• Spray bottle

These legacy staples continue to outperform many modern specialty cleaners when used strategically.


Step 1: Build a Versatile Cleaning Solution

Start by combining equal parts warm water and white vinegar in a spray bottle. Add two drops of dish soap. This creates a balanced formula that breaks down grime fast while maintaining a gentle profile for most surfaces.


Step 2: Target High-Touch Areas

Apply the solution across your home’s busiest surfaces — light switches, door handles, countertops, appliance doors, tiles. These touchpoints drive the bulk of visible wear, and optimizing them delivers outsized returns.


Step 3: Let the Formula Activate

Give it 60 seconds to work. This quick dwell time helps lift oils, fingerprints, and everyday buildup, enabling you to execute a cleaner pass with less physical effort.


Step 4: Deploy Baking Soda for Tough Spots

For areas with stuck-on residue, sprinkle a small amount of baking soda onto the damp surface. This soft-abrasive boost strengthens the cleaning cycle without scratching or dulling finishes.


Step 5: Wipe Down for a Clear, Fresh Finish

Use a microfiber cloth to wipe the surfaces clean in steady motions. The result is a polished, streak-free look that reinforces your home’s overall presentation.


Optional Step: Reset the Air

If you want to expand the refresh beyond surfaces, simmer a pot of water with a spoon of vinegar for a few minutes. This neutralizes lingering odors and resets the room’s atmosphere quickly.

The Rapid Shine Protocol: A Simple DIY That Elevates Your Home’s Clean Standard

The Rapid Shine Protocol: A Simple DIY That Elevates Your Home’s Clean Standard


In today’s fast-moving households, efficiency is everything. Homeowners want solutions that deliver immediate impact without compromising the timeless practices that have kept homes spotless for generations. This DIY approach brings both worlds together — a fast, cost-effective routine grounded in the proven fundamentals of home care.


Why This Method Works

Families rely on adaptable cleaning systems that cut through everyday mess without adding complexity. This protocol drives results quickly, enhancing the look and feel of your home with minimal effort.


What You’ll Need

To deploy this at scale across your home, all you need are familiar, budget-friendly tools:

• White vinegar

• Dish soap

• Baking soda

• Warm water

• Microfiber cloth

• Spray bottle

These legacy staples continue to outperform many modern specialty cleaners when used strategically.


Step 1: Build a Versatile Cleaning Solution

Start by combining equal parts warm water and white vinegar in a spray bottle. Add two drops of dish soap. This creates a balanced formula that breaks down grime fast while maintaining a gentle profile for most surfaces.


Step 2: Target High-Touch Areas

Apply the solution across your home’s busiest surfaces — light switches, door handles, countertops, appliance doors, tiles. These touchpoints drive the bulk of visible wear, and optimizing them delivers outsized returns.


Step 3: Let the Formula Activate

Give it 60 seconds to work. This quick dwell time helps lift oils, fingerprints, and everyday buildup, enabling you to execute a cleaner pass with less physical effort.


Step 4: Deploy Baking Soda for Tough Spots

For areas with stuck-on residue, sprinkle a small amount of baking soda onto the damp surface. This soft-abrasive boost strengthens the cleaning cycle without scratching or dulling finishes.


Step 5: Wipe Down for a Clear, Fresh Finish

Use a microfiber cloth to wipe the surfaces clean in steady motions. The result is a polished, streak-free look that reinforces your home’s overall presentation.


Optional Step: Reset the Air

If you want to expand the refresh beyond surfaces, simmer a pot of water with a spoon of vinegar for a few minutes. This neutralizes lingering odors and resets the room’s atmosphere quickly.

Revitalizing Your Home Tools: How Paracetamol Delivers a Quick Win for Burnt Irons

Revitalizing Your Home Tools: How Paracetamol Delivers a Quick Win for Burnt Irons

In today’s efficiency-driven environment, consumers expect smart, low-friction solutions that extend asset life without inflating operational costs. Yet the core philosophy remains unchanged: keep your tools clean, keep your workflow smooth. One of the most overlooked household assets is the iron—an essential device that quietly underpins polished presentation and day-to-day confidence.

But when the iron plate burns, scorches, or sticks, performance declines fast. That’s where a surprisingly effective legacy hack steps in: cleaning your iron using paracetamol.


Operational Breakdown: How to Execute This Simple Maintenance Method

• Heat the iron

• Hold a paracetamol tablet with a cloth or tweezers

• Gently rub the tablet across the burnt areas

• Watch the residue dissolve into a smooth, wipeable layer

This method capitalizes on the tablet’s chemical breakdown when exposed to heat, softening stubborn build-up and restoring plate glide performance in seconds. It’s a perfect alignment of old-school wisdom and modern resource optimization.


Why This Method Drives Value


1. Zero Procurement Delay

No need for specialized cleaning solutions. Leverage existing inventory and eliminate downtime.

2. Cost-Effective Asset Preservation

A restored iron extends lifecycle value and mitigates premature replacement costs.

3. Quick Operational Turnaround

The process takes minutes, reduces disruption, and supports a streamlined household maintenance cadence.

4. User-Friendly and Low-Risk

Minimal training required. No harsh chemicals. Just a simple, proven tactic executed with precision.


Driving a Culture of Smart Maintenance

This approach reinforces a timeless operational truth: maintenance isn’t an expense—it’s an investment. When we solve simple problems proactively, we enhance quality, reduce friction, and elevate daily productivity. The paracetamol method underscores how small actions can deliver outsized returns.


Final Thought

Smart living isn’t always about innovation; sometimes it’s about rediscovering efficient, time-tested solutions that keep our spaces—and our tools—running at peak performance. And if you’re already exploring ways to upgrade or modernize your home environment, especially your kitchen or bathroom, consider reviewing premium glass splashback solutions at DIY Splashback for long-term durability and high-impact design.

Designing for Human Behavior: How Spatial Flow Accelerates Daily Efficiency

Designing for Human Behavior: How Spatial Flow Accelerates Daily Efficiency

In today’s fast-paced landscape, households are evolving into micro-workflows—ecosystems where every design decision directly impacts productivity. As consumer expectations trend toward seamless living, spatial flow has become a strategic differentiator, not just an aesthetic lever. Forward-thinking homes are doubling down on intentional layouts that minimize friction, streamline movement, and reinforce long-term functionality.


Why Spatial Flow Is Becoming a Core Performance Metric

The modern home is no longer passive real estate—it’s a dynamic environment that supports multitasking, lifestyle flexibility, and rapid context switching. When circulation paths are clear, zones are well-defined, and visual cues are intuitive, residents move with greater confidence and lower cognitive load. This drives measurable gains in comfort, trust, and daily throughput.

Simply put: good flow reduces effort, and reduced effort increases satisfaction.


The Power of Micro-Decisions in Macro Results

Subtle, historically validated design choices—decisions homeowners have trusted for generations—are still outperforming trend-driven shortcuts. Strategic doorway alignment, logical proximity between task areas, or even consistent sightlines can cut literal minutes from daily routines. These micro-optimizations compound into stronger habits and a more predictable living experience.

This continuity between past and present reinforces a sense of stability, a core driver of homeowner confidence.


How Modern Homes Leverage Flow to Support Hybrid Living

The rise of remote work and multi-purpose spaces has spotlighted the need for flexible yet structured layouts. Efficient spatial flow enables:

Faster transitions between work, rest, and household tasks

Reduced bottlenecks in high-traffic zones

Improved emotional comfort through intuitive navigation

Better zoning without relying on complex renovations

Homes that prioritize movement create an environment where residents feel empowered—not constrained.


Bringing It All Together

As homeowners continue to prioritize environments that work as hard as they do, spatial flow remains a cornerstone of both traditional design wisdom and future-ready living. By honoring long-established layout principles while integrating smarter, simplified solutions, today’s homes deliver a streamlined, high-trust experience that aligns with evolving expectations.

If you're looking to modernize without disrupting what already works, focusing on spatial flow is the most strategic path forward.

For homeowners looking to elevate both functionality and visual continuity, incorporating modern surfaces is a strong operational win. Platforms like DIY Splashbacks provide accessible, precision-cut solutions that support clean lines, seamless zones, and the kind of effortless maintenance that keeps high-flow areas running efficiently day after day. It’s a practical upgrade that aligns perfectly with a home designed for fluid movement and everyday performance.

Reflections of Innovation: Why Glass Remains the Modern Designer’s Favorite Material

Reflections of Innovation: Why Glass Remains the Modern Designer’s Favorite Material

In an era defined by precision, clarity, and forward-thinking aesthetics, glass has solidified its role as a core material in modern interior design. It’s not just a surface—it’s a strategic design asset. Glass reflects innovation, elevates space, and supports the contemporary demand for environments that feel open, intentional, and intelligently built.

Designers continue to champion glass not because it’s trendy, but because it delivers consistent value—visually, functionally, and structurally.


1. Clarity as a Design Strategy

Glass has an unmatched ability to expand space. Its reflective qualities amplify natural light, open up layouts, and reduce visual weight.

Where traditional materials can feel heavy, glass communicates lightness and precision.

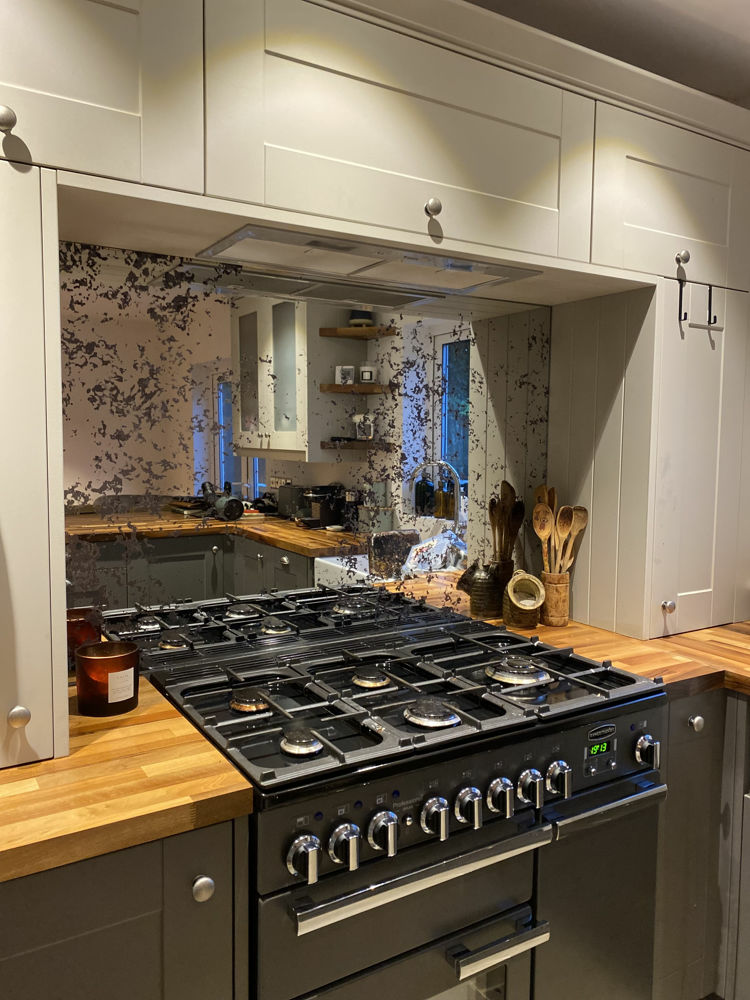
Whether used as a wall panel, a splashback, or a feature surface, it brings a sense of modern clarity that aligns perfectly with today’s demand for clean, adaptable interiors.

This is why DIY Splashbacks remains a key player in the market—offering made-to-measure glass solutions that enhance both residential and commercial environments with ease.


2. Future-Focused Functionality

Beyond aesthetics, glass delivers performance.

It’s resistant, hygienic, easy to maintain, and built to endure. In high-traffic spaces or work-intensive environments, this combination of durability and elegance is the definition of practical innovation.

Glass splashbacks in particular bridge the gap between beauty and utility—creating surfaces that perform under pressure while elevating the space visually.


3. Versatility That Outperforms Trends

Glass adapts.

It complements minimalist interiors, industrial spaces, luxury environments, and modern family homes. Its flexibility makes it a long-term design investment rather than a passing trend.

Designers appreciate glass for its ability to pair seamlessly with wood, metal, stone, or vibrant color schemes—bringing cohesion to any concept without overpowering the design language.

With customizable finishes, printed graphics, and rich color options, companies like DIY Splashbacks empower homeowners and designers to execute highly personalized visions.


4. Sustainability Driving Selection

As demand for responsible design grows, glass stands out as a sustainable choice.

It’s recyclable, long-lasting, and often sourced with minimal environmental impact—making it a smart material for future-ready spaces.

Choosing glass reflects more than style—it signals a commitment to conscious design.


5. Innovation Meets Identity

In modern design, materials must do more than fill space; they must communicate identity.

Glass sends a message of sophistication, confidence, and forward-thinking performance. It’s a material that aligns with both corporate spaces seeking presence and homeowners wanting a fresh, premium feel.

A single glass splashback or panel can redefine a room—quietly, but powerfully.


Final Remarks

Glass continues to lead the modern design narrative because it delivers what today’s environments demand: clarity, resilience, sustainability, and distinction.

With refined, customizable solutions from DIY Splashbacks, design professionals and homeowners can bring this future-forward material into their spaces with precision and ease.

Glass isn’t just a material—it’s a reflection of innovation, and it’s here to stay.

Practical Luxury: Why Minimalist Design Is the New Definition of Sophistication

Practical Luxury: Why Minimalist Design Is the New Definition of Sophistication

In today’s design landscape, sophistication isn’t tied to extravagance. It’s defined by clarity, intentionality, and the intelligent use of space. Minimalism has evolved from a trend into a long-term strategy—anchored in efficiency, elevated by aesthetics, and embraced by both homeowners and forward-thinking brands.

Minimalist design doesn’t remove personality; it amplifies it. The result is an environment that feels purposeful, streamlined, and unmistakably modern.


1. Efficiency as Elegance

Modern consumers gravitate toward spaces that function effortlessly. Minimalist environments remove visual noise, helping people move, think, and live with greater clarity. Clean lines, purposeful materials, and strategic lighting generate a sense of controlled calm—and that calm has become the new luxury.

Glass features, especially seamless splashbacks, reinforce this mindset. They keep surfaces clean, sharp, and unobtrusive, letting the architecture speak for itself.

DIY Splashbacks provides high-quality glass solutions that embody this principle—precision-engineered panels that deliver impact without overpowering the space.


2. Aesthetics Driven by Restraint

Sophistication today is rooted in refinement, not ornamentation. The minimalist approach values balance: fewer elements, greater impact.

Neutral palettes, crisp edges, and uncluttered surfaces create a timeless visual language that works across both residential and commercial environments.

A single glass splashback with a soft matte finish or a reflective gloss becomes a focal point—without the need for heavy embellishment. It’s design with discipline, and the result is unmistakably premium.


3. Materials That Honor Simplicity

Minimalist design places emphasis on materials that carry their own weight—clean, durable, expressive in their simplicity.

Glass communicates purity and precision.

Stone signals grounding and permanence.

Metal reflects structure and confidence.

Glass remains a standout because of its versatility. It enhances natural light, reinforces spatial clarity, and pairs effortlessly with wood, metal, or stone.

High-end glass splashbacks from DIY Splashbacks deliver that balance of practicality and understated luxury, reinforcing the disciplined aesthetic that minimalism demands.


4. Making Space for Purpose

Minimalism enhances the purpose of every element. Instead of designing to fill a room, the focus shifts to designing to serve it.

This shift is what makes minimalist design a strategic choice—especially in compact homes, commercial workspaces, or high-traffic areas where efficiency drives experience.

A well-placed splashback can define zones, sharpen visual flow, and elevate everyday routines without adding clutter. The impact is quiet, but it’s powerful.


Final Remarks

Luxury has changed. It’s no longer defined by abundance—it’s defined by intention. Minimalist design represents a new era of sophistication grounded in clarity, quality, and strategic restraint.

With solutions like those from DIY Splashbacks, homeowners and brands can elevate their environments with materials that are clean, modern, and built for long-term performance.

In a world full of excess, true elegance is found in simplicity.

Design That Speaks: How Surfaces Tell Your Brand’s Story

Design That Speaks: How Surfaces Tell Your Brand’s Story

Every space tells a story. From the moment a client steps through your door, the walls, textures, and finishes communicate who you are—before you even speak. Design is your brand’s silent ambassador, and the surfaces within your environment act as the language it speaks.

When executed with intention, design doesn’t just decorate—it differentiates.


1. The Silent Power of First Impressions

In business, perception is reality. A sleek glass panel, a consistent color palette, or a bold statement wall can establish credibility faster than any brochure.

Surfaces create subconscious cues—gloss signals innovation, matte suggests warmth, and balance projects stability. Every surface reflects your brand’s personality and values.

With customizable options from DIY Splashbacks, companies can easily align design elements with brand identity, ensuring their interiors communicate professionalism and precision from the first glance.


2. Branding Beyond Logos

Modern branding extends far beyond signage and color schemes. The physical environment must echo the same message your digital presence sends.

For example, a minimalist glass splashback in a showroom says efficiency and elegance. A textured metallic panel in a tech workspace says innovation and strength. Each choice reinforces the essence of your brand—without a single word spoken.

Design consistency across surfaces creates cohesion, and cohesion builds trust.


3. Materials as Messaging

Every material tells a story:

Glass conveys transparency, clarity, and innovation.

Metal projects resilience and precision.

Wood speaks warmth, tradition, and trust.

Choosing the right combination of these materials is how great brands communicate values visually. Glass splashbacks, in particular, have become a hallmark of modern design—they’re durable, elegant, and versatile enough to fit any aesthetic narrative.

DIY Splashbacks provides a range of glass options, finishes, and colors that allow designers and business owners to curate spaces that truly embody brand identity.


4. The Psychology of Surfaces

People respond emotionally to texture, light, and reflection. A high-gloss surface energizes, while soft tones soothe. Reflective surfaces create openness, signaling honesty and ambition.

By integrating reflective glass splashbacks, brands can enhance both natural light and perception of space—two key factors in how welcoming and trustworthy an environment feels.

When your surroundings feel intentional, your brand feels authentic.


5. From Space to Statement

Design isn’t just decoration—it’s communication strategy. Every surface becomes a touchpoint in your brand’s story. Whether in retail, hospitality, or office settings, surfaces are how your brand’s values translate into tangible experiences.

Great design ensures that what people see reinforces what you want them to believe.


Final Remarks

Your brand’s story deserves to be told with clarity, consistency, and confidence. Thoughtful surface design—especially with tools like DIY Splashbacks—turns walls into expressions of identity, trust, and excellence.

Because in modern business, design doesn’t whisper—it speaks volumes.